


When managing a domain, one important feature is the ability to point it to a specific IP address. This is often done using nameservers. In this article, we will explain how to create private nameservers for your domain. By setting up private nameservers, you can control where your domain points and connect it directly to the IP address of your server. This is useful if you want full control over your domain settings. We’ll guide you through the process step by step, using simple terms that are easy to understand.
What Are Private Name Servers?
Private Name Servers (or custom DNS) are DNS records pointing to your domain, like:
ns1.yourdomain.com → 192.0.2.1
ns2.yourdomain.com → 192.0.2.2
Private name servers let you offer DNS that matches your brand, instead of using your hosting provider’s generic names.
Before setting anything up, make sure you have:
- A registered domain at Royalhost (e.g.,
yourdomain.com) - A server with at least 2 dedicated IP addresses
Register Private Name Servers
Step 1: Log into Your Royalhost Account, and:
- Click on Domains in the menu.
- Select the domain you want to set up private name servers for.
Step 2: Manage Private Name Servers
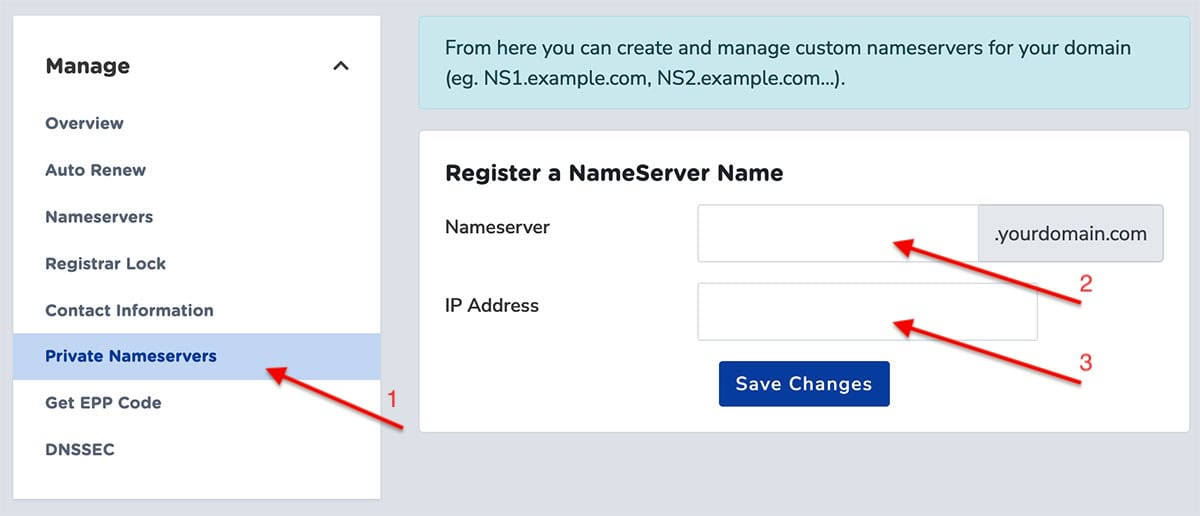
- On the domain management page, locate and select the “Private Nameservers” option.
- You will then encounter a section dedicated to registering new name servers.
Step 3: Create Your Name Servers
Suppose you intend to establish private name servers and route your domain to the following IP address: 192.0.2.1:
ns1.yourdomain.com → 192.0.2.1
ns2.yourdomain.com → 192.0.2.2Fill in the form like this:
- Name Server:
ns1 - IP Address:
192.0.2.1
Click Save Changes.
Repeat for the second one:
- Name Server:
ns2 - IP Address:
192.0.2.2
After saving, your private DNS will look like this:
ns1.yourdomain.com → 192.0.2.1
ns2.yourdomain.com → 192.0.2.2After creating private name servers, you can configure them to point your domain to the private name servers’ IP address.